
Want to start saving money right now? Use a Smart Thermostat
Still using an old-school thermostat? Or maybe you’ve got one of those digital ones but are constantly groaning at the thought of actually programming days and desired temperatures using only the three buttons provided. You might spend some time on it, the device blinks, and … then the AC comes on whenever it feels like it.
Who’s got time to figure THAT out? We hear you, and we promise there is a better way.
Enter your new friend, the smart thermostat.
With a smart thermostat, you can easily monitor your energy usage, but how does it work?
Generally, a smart thermostat begins to learn optimal times to achieve energy efficiency by dropping temps when it’s cold out and no one is home (bringing them back up in time for your return). Additionally, it’ll ease off on wasteful cooling when it’s not needed – making similar adjustments at night when folks are usually in bed. These little adjustments add up to big savings, and begin to happen automatically over time after minor programming upfront. Conveniently, these smart thermostats allow you to control your home heating and cooling from your phone, which is a fantastic feature for travel. Just set the thermostat to stay low while you are gone; when you come home, it will have risen to a more comfortable temp.
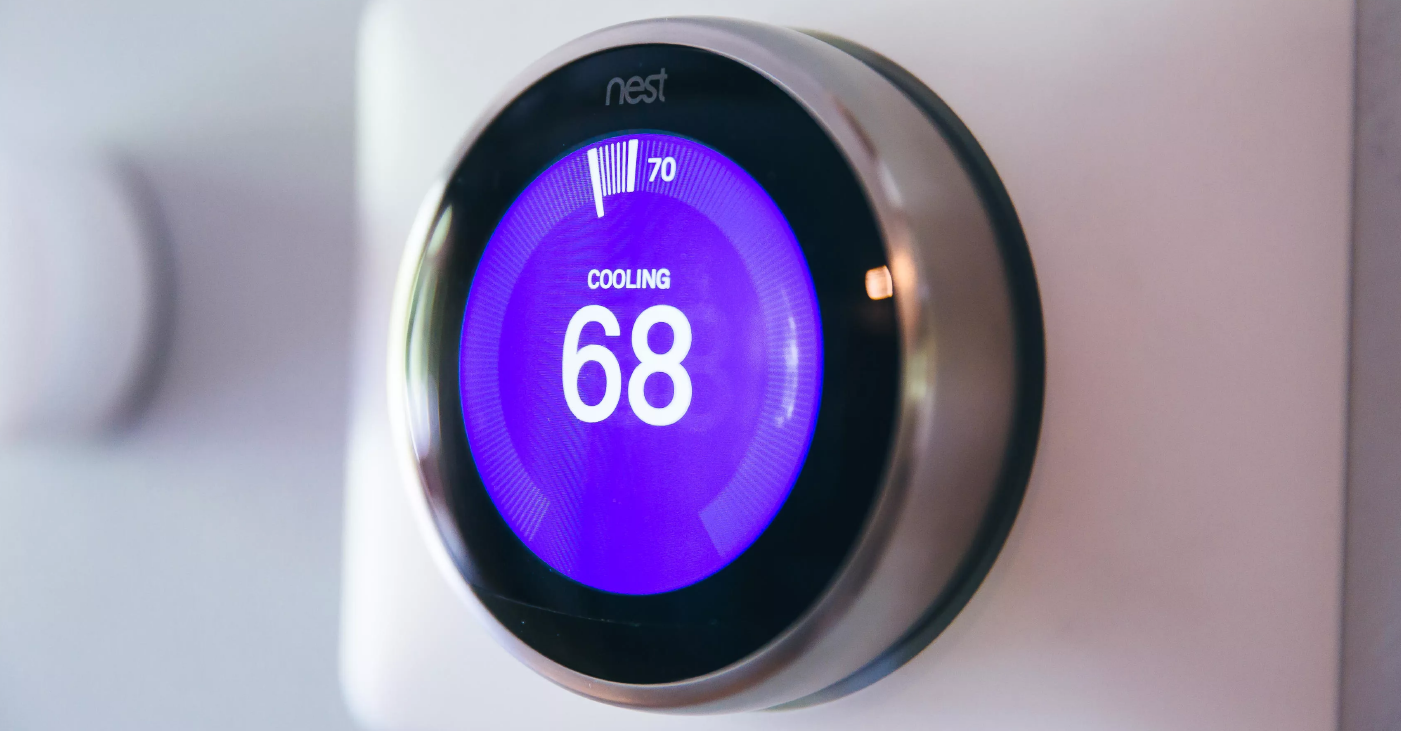
Installing a smart thermostat can instantly save you time and money. They’re especially nice in the dog days of August when you want to come home to a space that’s pleasantly cool, all while cutting your energy bill up to 20 percent. (Bonus: ComEd even offers pretty nice rebate on the purchase of a smart thermostat.)
Even better news: If you are good at following instructions and comfortable with a screwdriver and wiring, you can replace your traditional thermostat with a smart model like Google Nest or Ecobee in well under an hour. (And of course our skilled, certified Nest Installers at Fixer can help you do it too.)
How to install a smart thermostat
WHAT YOU WILL NEED:
-
a small flat head screwdriver (-)
-
Phillips head (+) screwdriver
-
one smart thermostat kit (we will feature Nest below)
-
the ability to turn off the power
-
and a focused mind (breathe deep before you begin as you will need to pay attention to some pretty specific instructions).
Let’s check to make sure your HVAC system is compatible.
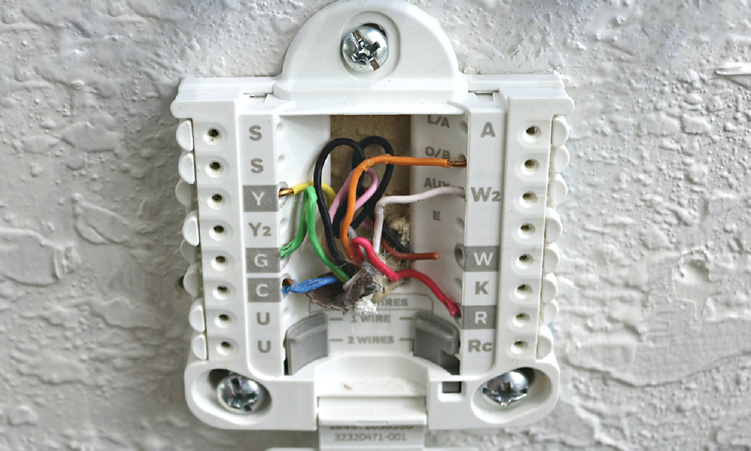
Before you begin the work, you want to make sure you have a compatible HVAC system. Generally speaking, smart thermostats use “low voltage” 24V wires to connect to HVAC systems or “central heat” or “central air”. If you have one single thermostat in your house (or multiples if you’re multi-zone) that controls a large furnace that’s tucked away in your basement or attic, you are good to go. If you pop off the front plate of your existing thermostat, you’ll see a rainbow of thin colored wires.
You can install one in just a few steps:
-
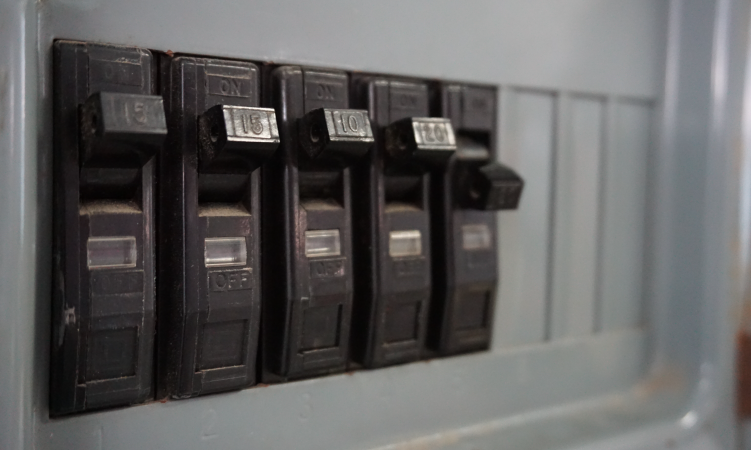
Turn off the power – safety first!
-
Remove the plastic or metal casing from the wall using a screwdriver. Then carefully remove each of the small low voltage colored wires from the thermostat unit.
PRO TIP: BEFORE you do this, take a photo of the small colored wires and how they are attached to this old thermostat as this will help you in matching the wire to the new thermostat AND save you frustration in case you may need to put the old one back.
-
Now you will be looking at a hole in the wall with the various colored low voltage wires sticking out. Take a deep breath. You’re doing great!
-
Refer to the specific installation guide of the smart thermostat you have purchased for specific installation of the unit and feeding the correct wires to the slots in the new unit. (For this example, we will discuss a Nest installation as this is one of the most popular thermostats we install for customers.)
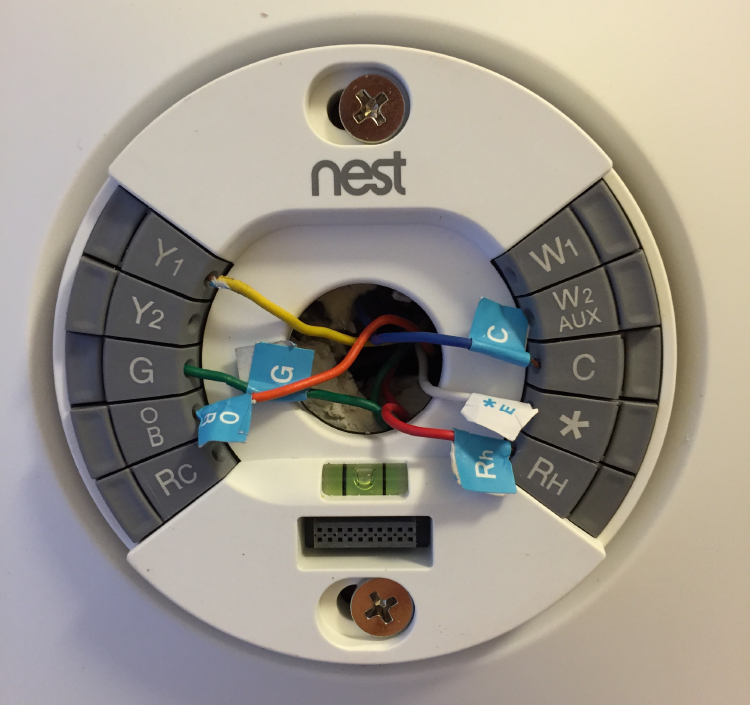
5. Thread all of the wires from the wall through the middle hole in the round Nest backplate (the one with the tiny ‘lil level on it – cute huh?). Next attach this round plate to the wall using the screws and screwdriver provided. If you have a larger hole, you can use the larger rectangular plate in addition to round one to cover more of the wall.
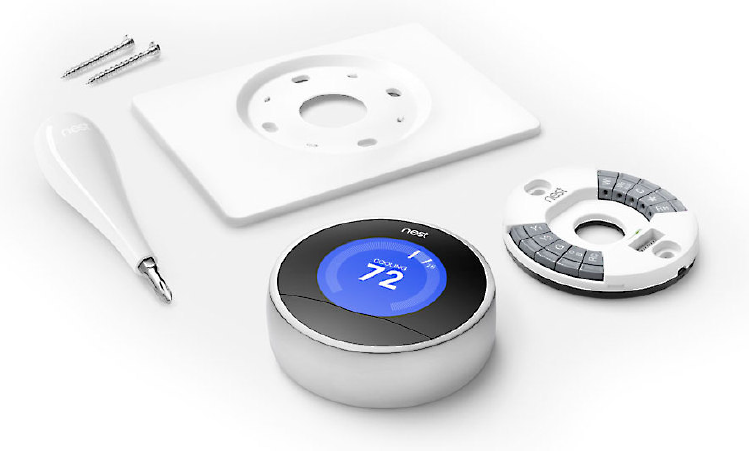
6. Now, refer to the Nest guide as well as that photo you took of the connections on your old thermostat. You will now match up the connections to the snaps in new Nest plate. You will feel a little tab click when you have properly connected the wire.
7. Now you will attach the front of the Nest display by lining up the rectangular pin connector that’s on the back of the plate with the front and connecting them. Don’t brute force this as you can bend the pins. It’s made to click together.
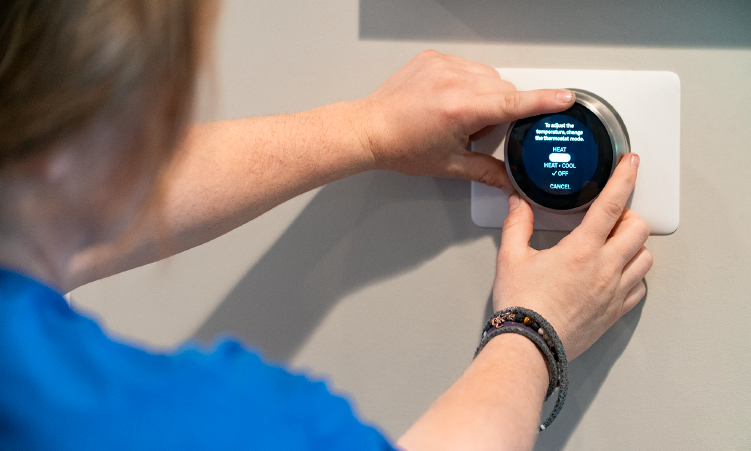
8. Turn the power back on! You’ve now completed all of the manual labor. Next you will be programming the Nest to connect with your Wifi (Nest provides great instructions) and you are on your way to savings!
If you’re still feeling a little daunted by the prospect of installing a smart thermostat, we can help. Schedule an appointment anytime at fixer.com or by texting 312-216-5999.