

Carving Pumpkins with Power Tools
Spooky season is upon us! Need some pumpkin carving inspiration to get into the Halloween spirit? At Fixer, we’ve put together some tips and tricks for taking your pumpkin carving skills to the next level. Everyone is familiar with the classic toolset, consisting of cheap and flimsy carving tools. Which typically results in a whole lot of elbow grease and way too much time. Imagine the seasonal masterpieces you’ll come up with by using power tools to create more intricate designs. From drills to saws, learn all about the creative techniques you’ll gain by carving pumpkins with power tools.
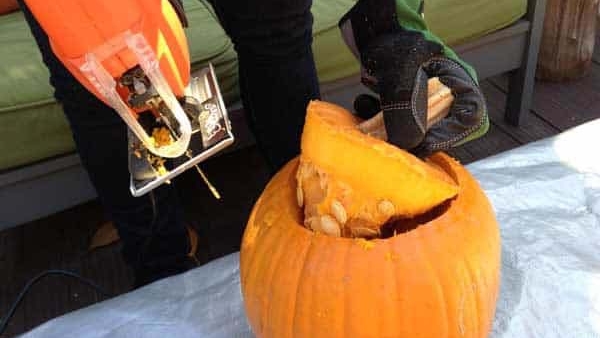
Jigsaw Tool
If you’ve ever fumbled with an inferior carving knife, you will love how easy the jigsaw makes carving out shapes. Start by setting the speed on slow; make sure to be careful not to have hands in the way of the blade. Use it to carve out a hole in the top of the pumpkin or to cut perfect shapes. The blade used in the jigsaw has teeth very similar to handheld carving tools. You’ll really enjoy how quick and precise the results are!

RotoZip Spiral Saw
The rotozip spiral saw is really great for freehand cuts and irregular shapes. It can really save some time cutting out your design; be careful for any knots, which can cause the tool to slip and ruin your design.
Image Source: https://www.youtube.com/watch?v=lP2TOAv4lYw
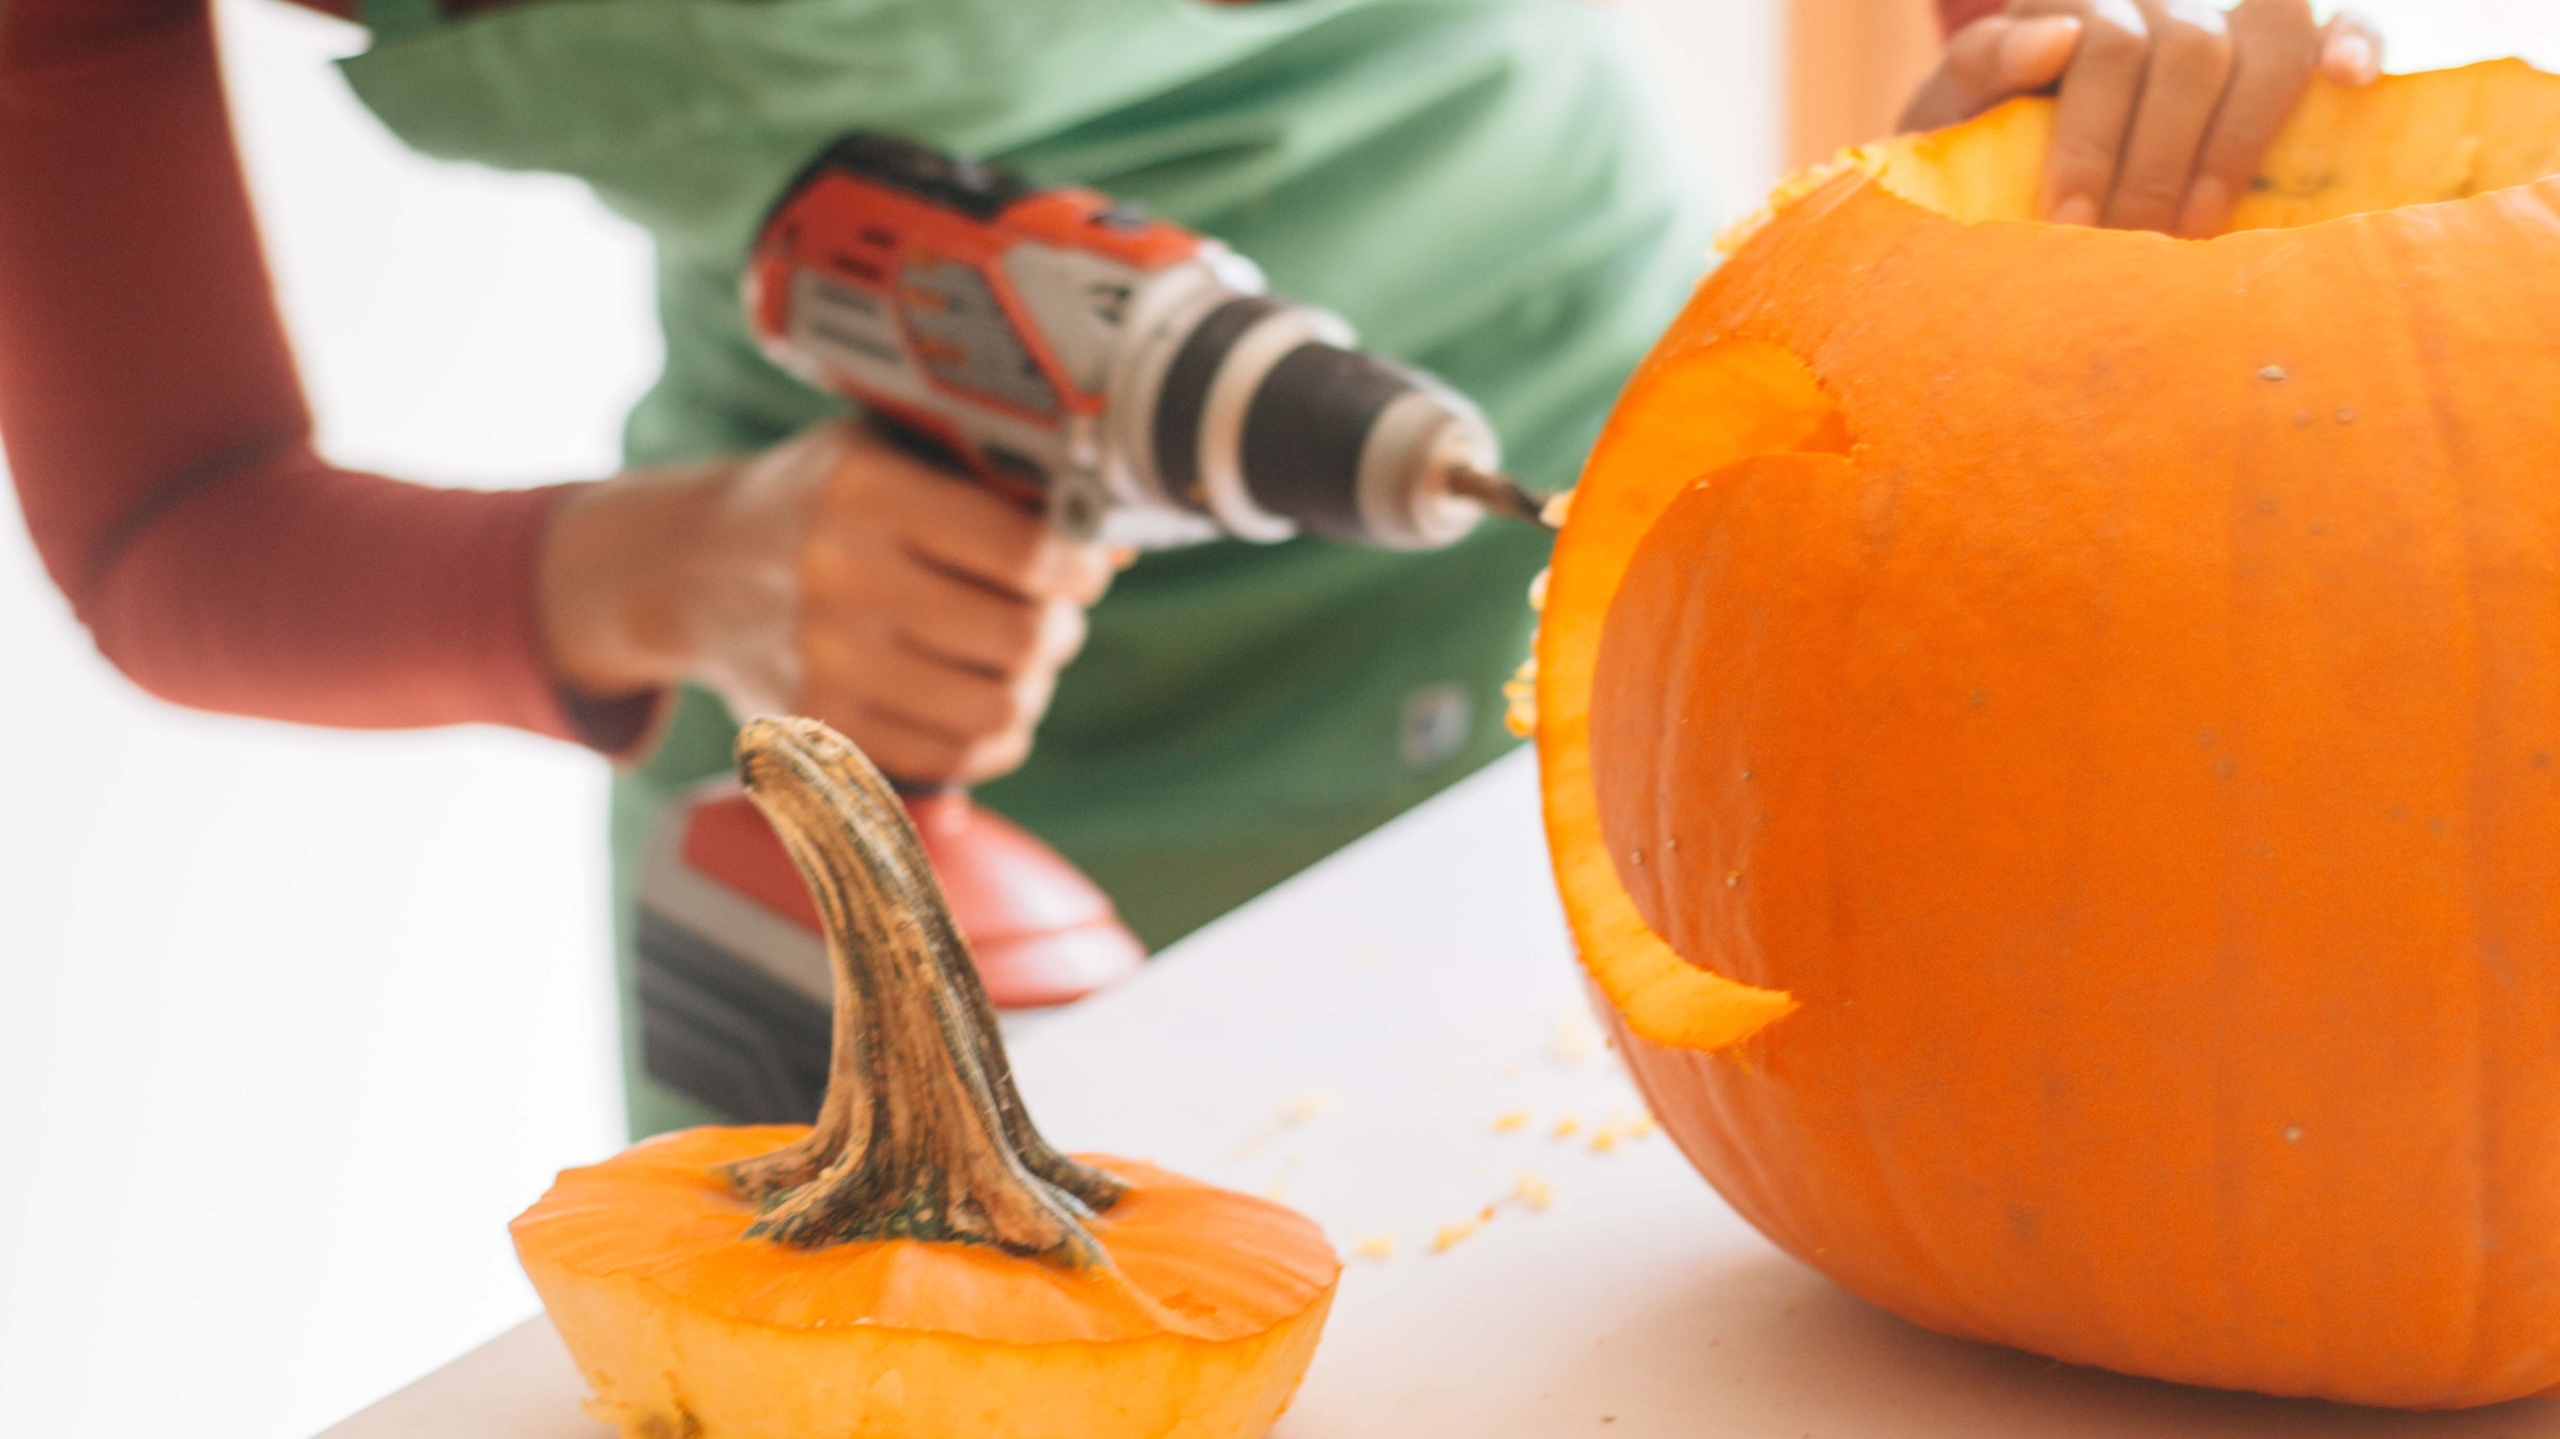
Power Drill with Attachments
Depending on the design you’re going for, a common household power drill can be a super helpful tool! You can use a small drill bit and create a connect-the-dot pattern to transfer a design onto your pumpkin. By using a spade bit or hole saw drill bit, you can create various size holes. The precision and speed at which you can make cut-outs make this tool super handy.
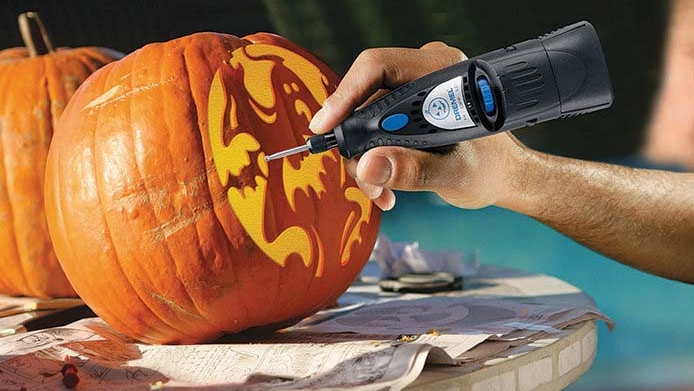
Dremel Tool
The dremel tool can really bring your carving to the next level! There are a variety of bits that can sand, carve, etch, and engrave. By using the sanding attachment, you can shave off the exterior to reveal a different shade. This will result in a unique look and even give your pumpkin a fleshy glow. The possibilities are endless with this multi-tool!
Image Source: https://www.doitbest.com/resources/articles-and-buying-guides/manufacturers/easy-pumpkin-carving-with-a-dremel
TIP: Using a cordless version, ideally a model that has a work light works best!

Linoleum Cutter
Our final featured tool may not be a power tool, but it’s certainly noteworthy. The linoleum tool, equipped with various attachments for surface carving, is a versatile and traditional gadget worth mentioning. This tool is actually used in printmaking and is ideal for adding detail to your design with consistency and precision.
Tip: Don’t discard or forget about the pieces you carve away. Find creative ways to incorporate the scraps into your design. For example, using the guts, seeds, or carved skin pieces to create other face detail elements in your design.

How to Choose the Perfect Pumpkin for Carving
Now is the perfect time to visit your local farm or grocery store and make your selections. Get creative with the variety of colors and styles to choose from! Here’s what to look for choosing a healthy pumpkin…
- Select the perfect pumpkin with a fresh, long green stem for optimal freshness. The greener the stem, the more recently it was harvested. Be sure to avoid pumpkins with broken stems, as they tend to decay faster. Keep uncut pumpkins stored in a cool, dry place away from direct sunlight for an extended shelf life of approximately 8-12 weeks.
- Look for a pumpkin with a bright-colored flesh & semi-smooth texture (easier for carving).
- Check the base of the stem where it meets the pumpkin, if there is any mold or mildew, keep looking. This is not a good sign of a healthy pumpkin.
- TIP: If you’re trying to preserve your pumpkin and prevent mold growth, make sure to clean the insides out; including the stringy stuff. You can preserve your pumpkin by misting the inside daily with a mixture of lemon juice and water.
From our Fixer crew, we hope this post inspires you to try carving pumpkins with power tools this season! If you’re looking for some free carving templates, check out: The Ultimate Pumpkin Carving List of over 1,000 free stencils OR Over 130 Free Disney Stencils. For some additional power tool inspiration, check out these YouTube videos: DIY Network’s Power Tool Pumpkin Carving OR How to Carve a Pumpkin with a Dremel Tool.
At Fixer, we prioritize safety. When you’re carving pumpkins with children present, it’s essential to ensure comprehensive supervision, even when power tools are turned off. Please reference this article to learn more about safely operating power tools around children.

What is Fixer?
Our team of skilled handy people (our Fixers) deliver best in class service from start to finish. We’re committed to excellence – in who we train and hire, in our values and in our work. Our crew specializes in common household repairs and home maintenance to-dos. We respond promptly and deliver quality repairs and upgrades for our customers every single day. We’re now servicing Chicago + burbs, Dallas, Denver, Los Angeles, Phoenix, and Seattle. Learn more about our services and our Membership Plan by visiting fixer.com.